What Is an HDR Image? Gain Maps, PQ/HLG, and Converting on a Mac
Published by @SoNiceInfo at 9/24/2026
Have you ever opened a photo from an iPhone or a recent camera on a Mac with a Liquid Retina XDR display and seen the sun, a sunset, or light glinting off water look as if it were actually glowing? That is what HDR (High Dynamic Range) photos can do.
But as soon as you convert those photos for the web or send them to someone, trouble starts: the highlights suddenly blow out and lose detail, or the whole image turns dark and dull. HDR images are structured very differently from SDR images, so ordinary tools can't process them correctly.
This article explains what HDR images are and how they work (gain maps versus PQ/HLG), then walks through practical ways to batch convert and export them on a Mac without losing HDR brightness or wide color.
1. What is an HDR image? How it differs from SDR
HDR (High Dynamic Range) is a technology that records and displays a far wider range of brightness, from the darkest shadows to the brightest light, than the conventional SDR (Standard Dynamic Range) format.
The limits of SDR: why photos used to look like paper
SDR (sRGB), the long-standing standard for the web and computers, is based on a specification from the era of CRT televisions.
- Peak brightness: About 100–200 nits (cd/m²)
- Color depth: 8 bits per RGB channel (256 levels, about 16.77 million colors)
- Color gamut: sRGB
In SDR, white is just the value RGB(255, 255, 255). A sheet of white copy paper indoors, direct summer sunlight, and a streetlight against the night sky all hit the same ceiling of 100% white. Brighten the sun and the blue sky around it blows out to white; keep the sky clean and everything on the ground crushes to black. That was the physical limit of SDR.
What HDR changes: light that actually looks bright
On HDR displays (the Liquid Retina XDR display in MacBook Pro, Pro Display XDR, recent smartphones, and so on), normal screen brightness stays around 100–200 nits while only the highlights are boosted locally to 1,000–1,600 nits, and in some cases 4,000 nits or more.
| Feature | Conventional SDR image | Modern HDR image |
|---|---|---|
| Peak brightness | About 100–200 nits | 1,000–4,000+ nits |
| Color depth (gradation) | 8-bit (256 levels) | 10-bit (1,024 levels) to 12-bit |
| Color space (gamut) | sRGB | Display P3 / Rec.2020 (wide gamut) |
| Banding | Common in sunsets and skies | Extremely smooth gradients |
| Common formats | Standard JPEG, PNG, WebP | AVIF, JPEG XL, Ultra HDR JPEG, HEIC |
The shade under a tree stays calm and dark, while only the sunlight filtering through the leaves and the reflections on the water sparkle the way they do in real life. The result is much closer to what your eyes actually saw.
2. The two types of HDR images: gain maps and direct encoding
“HDR image” covers two broad approaches in use today: gain maps and direct encoding. Understanding the difference is the first step toward converting and handling them properly.


Type A: Gain maps (Gain Map / Ultra HDR / Apple HDR)
Gain maps are today's mainstream approach, designed with compatibility first.
- Structure: A normal SDR image carries a grayscale auxiliary image (the gain map) in its metadata. The map records how much to brighten each pixel when the image is shown on an HDR display.
- Behavior:
- SDR displays: The map is ignored and the image appears as a normal SDR photo, with no odd color shifts.
- HDR displays: The OS or browser reads the gain map and boosts pixels to match the screen's capability (peak brightness), making the highlights glow.
- Key standards:
- Ultra HDR: A JPEG-based format standardized in Android 14 and later and in Google Chrome.
- Apple HDR: The gain map technology used by the iPhone Photos app and in HEIC files.
- ISO 21496-1: The international gain map standard agreed on by Apple, Google, Adobe, and others (published July 2025). Supported by iOS 18, macOS 15, Android 15, and later.
Type B: Direct encoding (Direct PQ / HLG / Rec.2100)
Like film and broadcast (the Rec.2100 standard), direct encoding stores the image data itself as 10-bit or 12-bit values using a transfer function (curve) made for HDR.
- PQ (Perceptual Quantizer / SMPTE ST 2084): A curve designed around human vision that can specify absolute luminance from 0 to 10,000 nits. Widely used in film production and high-end photo masters.
- HLG (Hybrid Log-Gamma / ITU-R BT.2100): Records shadows and midtones with a conventional gamma curve and highlights with a logarithmic curve. It comes from broadcasting and stays reasonably compatible with SDR displays.
- Typical formats: AVIF, JPEG XL, and HEIC (10-bit).
Direct encoding stores no duplicate data and keeps files as small as possible, but in older environments that don't support it, the whole image can look washed out and faded.
3. Why HDR conversions go wrong (three pitfalls)
Many people run into trouble when they try to convert a beautiful iPhone photo or HDR material exported from a camera into another format. There are three main causes.
Pitfall 1: CICP metadata and gain maps get dropped
HDR images carry color metadata called CICP (Colour Primaries, Transfer Characteristics, Matrix Coefficients), as well as binary gain map data.
Many image converters and free online services don't understand this newer metadata. They strip it out as “unneeded Exif data,” so the exported image is treated as ordinary sRGB and you end up with flat, dim contrast and dull colors.
Pitfall 2: No tone mapping, so highlights blow out and shadows crush
Converting 10-bit data with a dynamic range above 1,000 nits straight into an 8-bit JPEG or PNG simply doesn't work.
If the converter doesn't apply proper tone mapping (an algorithm that compresses the tonal range), every bright area above 100 nits is clipped to RGB 255 (pure white), and the detail in the highlights is blown out.
Pitfall 3: The risks of free online converters
The free converters you find by searching for “HDR converter” work by uploading your images to a server, often overseas.
Handing unreleased work, high-quality portfolio masters, client deliverables, or photos of family and friends to someone else's server is a real security and privacy risk. On top of that, most online converters don't properly support HDR, so what you get back is usually a degraded 8-bit SDR image.
Recommended4. Method 1: Batch convert with Image Tool+ by drag and drop
If you work with HDR images on a Mac, the most reliable way to get high-quality results is the Mac app Image Tool+.
Image Tool+ is deeply optimized for Apple Silicon's image pipeline and correctly recognizes transfer curves, peak luminance, CICP, and gain maps (Apple HDR / Ultra HDR). It exports to AVIF, JPEG XL, WebP, and more while keeping HDR tonality and the wide Display P3 / Rec.2020 gamut intact.
Drag and drop your images
Drop several iPhone HEIC photos or HDR images from your camera straight from Finder. Whole folders work too.
Choose an output format
Pick AVIF for web delivery, JPEG XL for archiving photo masters, or WebP for the widest compatibility.
Press Start to export them all
On Apple Silicon, even hundreds of 10-bit HDR images finish in seconds to tens of seconds. Processing is fully local, so your images never leave your Mac.
Encode
- AVIF60
- JPEG XL80
- WebP75
- JPG80
Resize
Max 1920pxStrip metadata
EXIF · GPS · camera- GPS35°41'22"N · 139°41'30"E
- CameraCanon EOS R5 · RF 50mm F1.2 L
- Date taken2024:08:14 18:22:07
- ICC profileDisplay P3 · kept
Output
4032 × 3024Why photographers choose Image Tool+ for HDR
- Full HDR and wide-gamut preservation: Keeps CICP tags and gain maps, and outputs faithfully in 10-bit YUV 4:4:4 / 4:2:0.
- Before/after comparison preview: Drag the slider across the image to check the quality and color of the export pixel by pixel before you save.
- Batch resize, watermark, and rename: Everything you need to publish work online or deliver a portfolio, done in a single pass.
- EXIF editing that protects HDR metadata: Add a copyright credit or remove GPS data before posting to social media without breaking the HDR brightness information.
- 100% offline, fully local processing: No need to upload large RAW files or confidential photos to the cloud. Everything completes safely inside the App Sandbox.
- One-time purchase: No monthly subscription. Buy it once and keep using it.
macOS 12+ · Apple Silicon native · One-time purchase
For terminal users5. Method 2: The command line (CLI) and what to watch for
For developers and engineers who want to automate conversion in scripts, here is how to encode HDR images with command-line tools installed through Homebrew.
The example below exports AVIF, the most widely supported HDR format on the web, with the official encoder avifenc (libavif).
brew install libavifSpecify the CICP parameters explicitly
To export HDR correctly from the command line, you must explicitly specify 10-bit depth (--depth 10) and the CICP values. Leave them out and the image is encoded as ordinary SDR.
avifenc --depth 10 --cicp 9/16/0 input.png output_hdr.avifHere is what the main options mean:
--depth 10: Output 10-bit color (required for HDR).--cicp 9/16/0:9= Colour Primaries: BT.2020 (wide gamut)16= Transfer: SMPTE ST 2084 (the PQ curve)0= Matrix: GBR / Identity
- To export with the HLG curve instead, change the transfer to
18(BT.2100 HLG) and specify--cicp 9/18/0.
The hurdles of a CLI workflow
The command line is flexible, but keep the following in mind:
- It is extremely difficult to read Apple's proprietary gain map directly from an iPhone
.heicfile and carry it over to an AVIF gain map. - You have to work out each image's color space (Display P3 or Rec.2020) and transfer curve yourself and set the CICP flags to match.
If you process large numbers of photos regularly, a GUI app that detects all of this automatically (Image Tool+) will save you a great deal of trouble.
6. Serving HDR images correctly on a website
When you publish HDR images on a website or blog, keep in mind that not every visitor has an HDR monitor.
By combining the CSS media query dynamic-range with the HTML <picture> element, you can build an ideal responsive setup that serves a bright HDR image to HDR-capable environments and a lighter SDR image to everyone else.
<picture>
  <!-- HDR displays: HDR AVIF with bright highlights and wide color -->
  <source media="(dynamic-range: high)" type="image/avif" srcset="/images/posts/hdr/venice-sunset-hdr.avif" />
  <!-- Standard SDR displays: a lighter SDR AVIF -->
  <source type="image/avif" srcset="/images/posts/hdr/venice-sunset-sdr.avif" />
  <!-- WebP fallback -->
  <source type="image/webp" srcset="/images/posts/hdr/venice-sunset-sdr.webp" />
  <!-- Final fallback -->
  <img src="/images/posts/hdr/venice-sunset-sdr.jpg" alt="Sunset over the Venetian lagoon" width="1600" height="1000" loading="lazy" />
</picture>
Implementation tips
media="(dynamic-range: high)": This<source>is used when the display supports HDR. Firefox, however, renders HDR images as SDR, so a PQ/HLG AVIF can look dark there. Check how each browser renders the result.- Provide an SDR fallback: Visitors on SDR displays load the regular SDR AVIF or WebP, so the image never ends up looking dark or faded.
- Using an Ultra HDR JPEG with a gain map: A gain map image placed with a single
<img src="venice-sunset-ultrahdr.jpg">is rendered automatically as HDR where supported and as SDR everywhere else.
Live demo: check it on your own display
This page serves images set up exactly like the code above. The table shows what your display and browser report right now.
Support in your current setup
| HDR displayCSS (dynamic-range: high) | Detecting… |
|---|---|
| HDR videoCSS (video-dynamic-range: high) | Detecting… |
| Color gamutCSS (color-gamut) | Detecting… |
| Loading the HDR AVIFthe sample images below | Detecting… |
| Image chosen by <picture>img.currentSrc | Detecting… |
The media queries tell you whether the display and browser combination can handle HDR, not how bright the display can get. On a Mac the result changes when you move the window to another display or when brightness drops to save power, and this table updates automatically.
Sample 1: switching with <picture> (the code above, live)
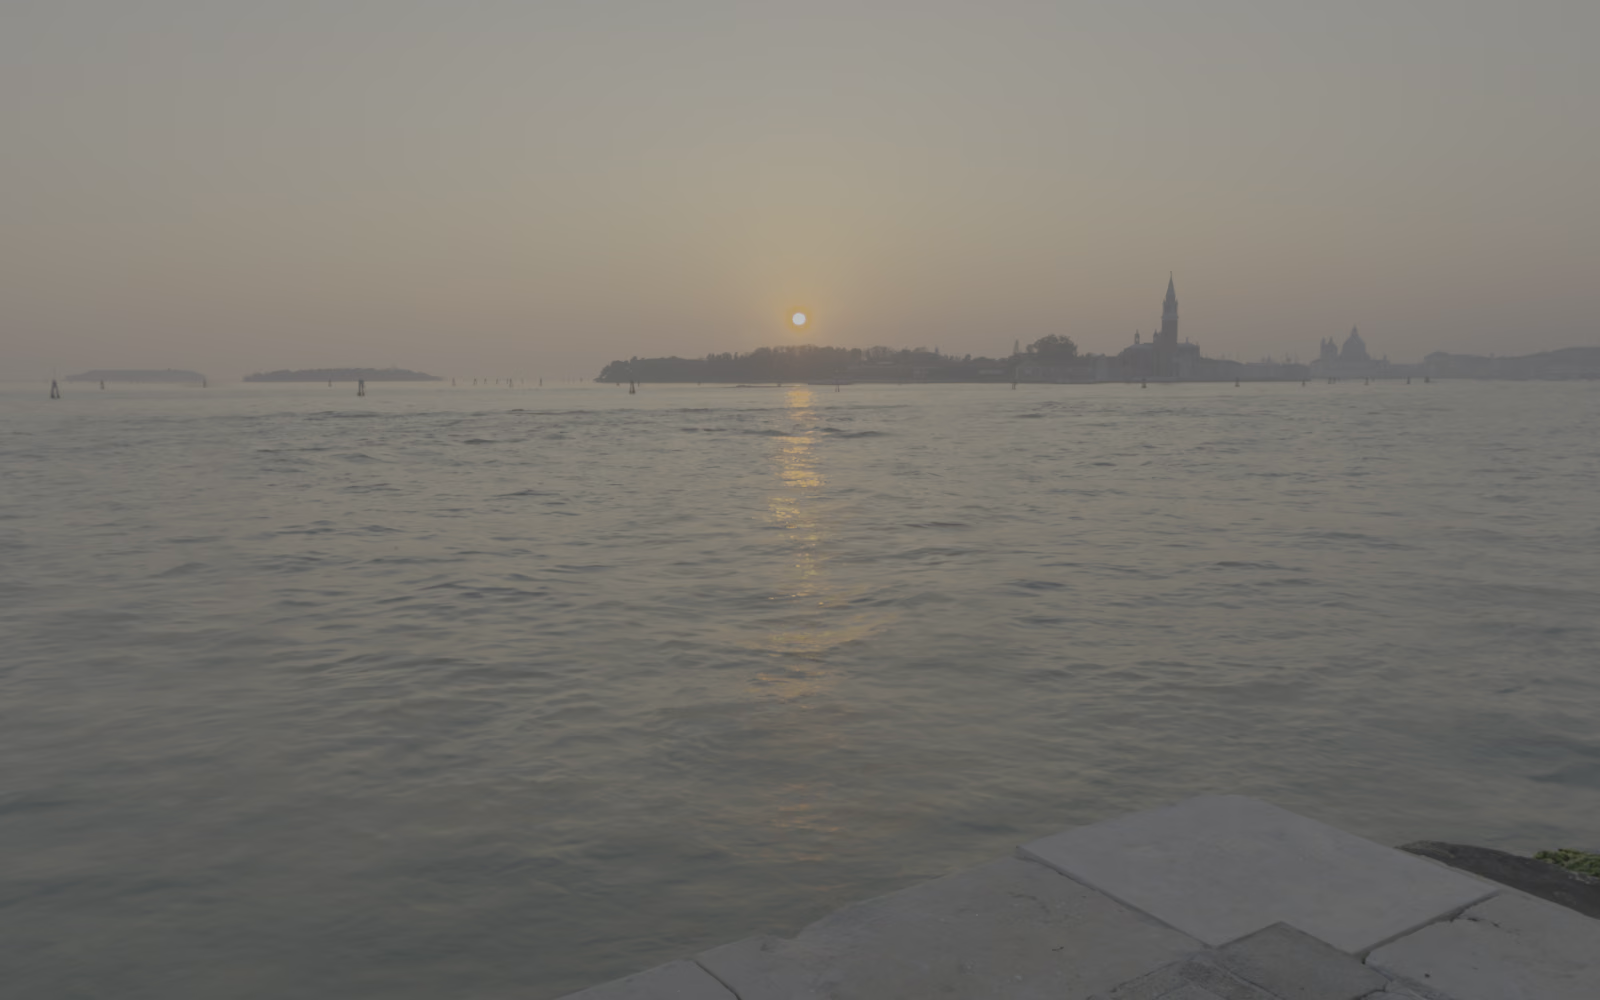
Detecting…Sample 2: SDR, HDR and gain map versions side by side
 HDR
HDR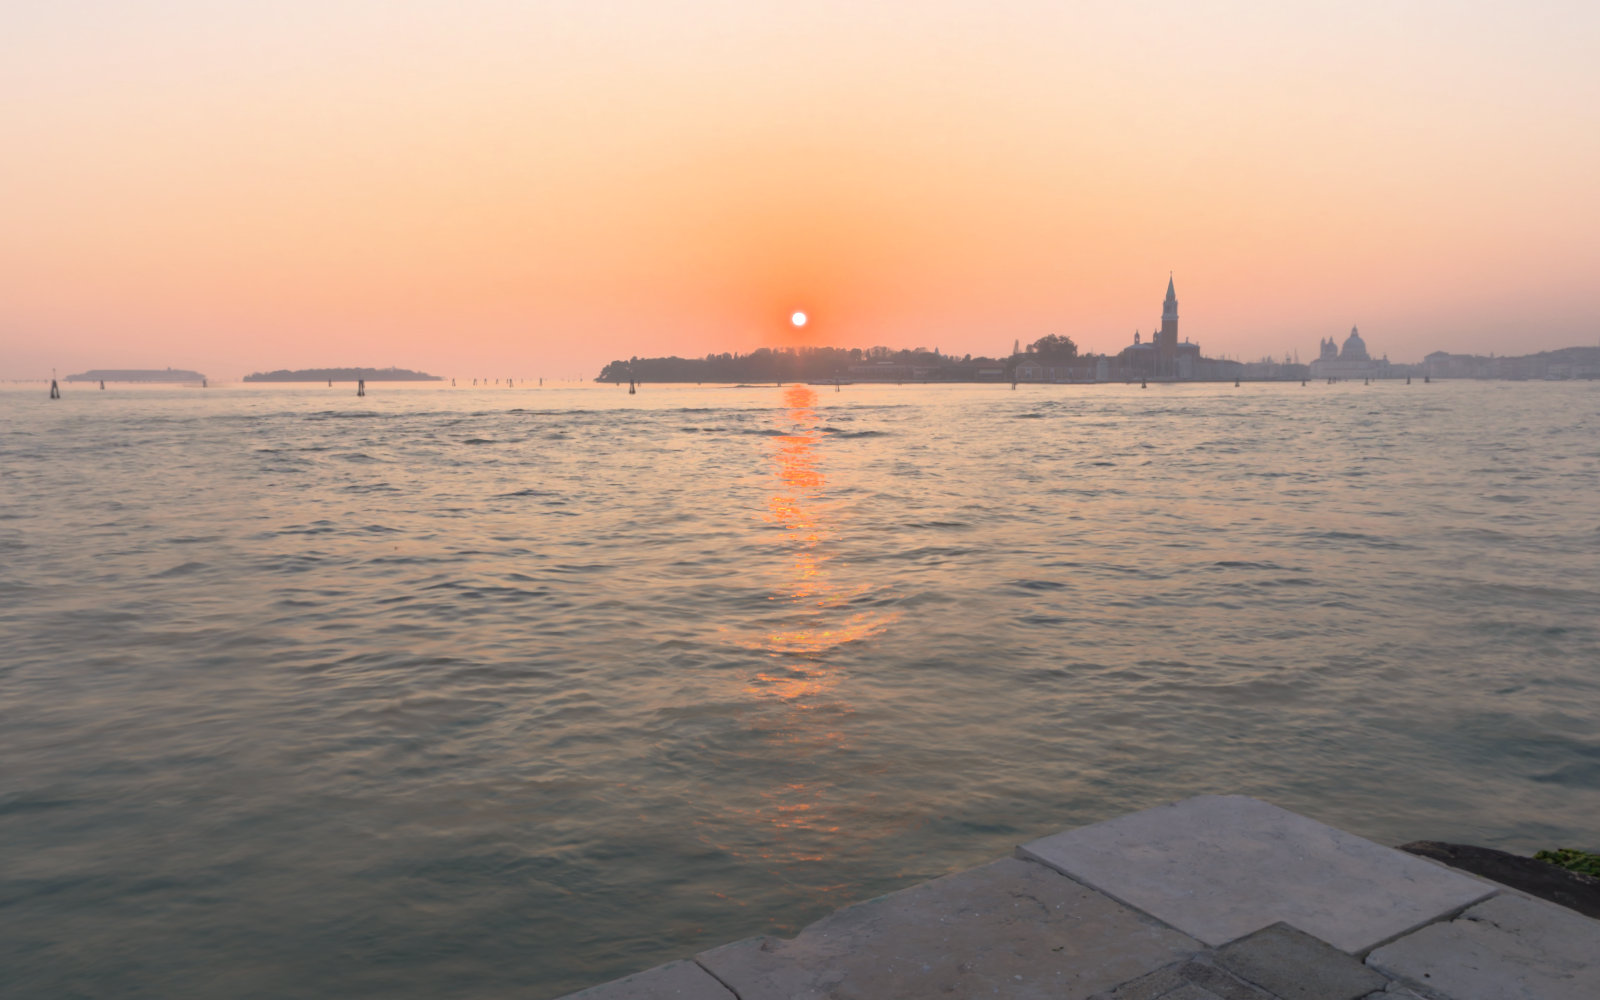 GAIN MAP
On an HDR display, only the sun and the sparkle on the water glow brighter in the HDR and gain map versions; the water and the paving stones stay as bright as in the SDR version. HDR does not make the whole screen brighter; it gives highlights brightness beyond the SDR white. When the display's headroom is below the image's peak (about 5× SDR white), the browser tone maps the PQ AVIF on its own while the gain map version is shown partway between its SDR and HDR renditions, so the highlights of these two can differ slightly in brightness and color.
Source: “Venice Sunset” by Greg Zaal (Poly Haven), CC0 1.0 (public domain). The view toward the sun is cropped from a real HDRI merged from bracketed exposures, and both the HDR and SDR versions are written from the same linear pixel data. SDR white = 203 nits, HDR peak 1000 nits (MaxCLL).
7. Choosing the right HDR format for the job
Several image formats support HDR. It's best to choose one based on what you need it for.
| Format | Key features and advantages | Best for |
|---|---|---|
| AVIF | About 50% smaller than JPEG. Supports 10/12-bit HDR (PQ/HLG) and gain maps. Every major browser displays AVIF, but only Chrome, Edge, and Safari 26+ show it as HDR; Firefox shows SDR. | The go-to format for HDR on the web |
| JPEG XL (.jxl) | Very high quality, with support for high bit depths and wide gamut. Existing JPEGs can be converted to it fully losslessly. Displayed in Safari 17 and later, as HDR from Safari 26. Chrome and Firefox are scheduled to enable it by default in October 2026 (Firefox shows SDR). Social platforms don't accept it, so it's not for sharing. | Long-term storage and archiving of photo masters |
| Ultra HDR (JPEG) | Adds a gain map to a standard JPEG. Shown as HDR on Instagram, Threads, Google Photos, iPhone, Android, Chrome, and Safari 26+. Its strength is compatibility: environments without HDR support still display it as a normal JPEG. | Social media and sharing (support by platform) |
| HEIC | The standard for capturing and storing photos on Apple devices. High quality and efficient, but Chrome, Edge, and Firefox can't display it, so convert to a gain map JPEG before sending it outside Apple devices. | Shooting and managing photos on iPhone and iPad |
For a closer look at how the formats compare, see our WebP vs AVIF comparison and our guide to batch converting images to JPEG XL.
8. FAQ
Q. What is the biggest difference between HDR and SDR photos?
The range of brightness they can show (dynamic range), along with their color gamut and tonal depth. SDR photos top out at roughly 100–200 nits and are limited to 8 bits (256 levels) per channel, so a bright light and a sheet of white paper both end up as the same “RGB 255”. HDR photos reach peak brightness of 1,000–4,000 nits or more with 10 bits (1,024 levels) or deeper, in wide gamuts such as Display P3 or Rec.2020, so highlights look as if they are actually giving off light while the shadows keep their detail.
Q. What is a gain map?
A gain map is a grayscale map embedded in the metadata of a standard SDR image. It records how much brighter each pixel should become when the image is shown on an HDR display. SDR displays show the image as a normal photo, while HDR displays apply the map and make the highlights glow. Android's Ultra HDR, Apple's HDR photos, and the international standard ISO 21496-1 all use this approach.
Q. Why do my iPhone HDR photos look blown out or dull after converting them?
Many common converters and websites can't handle the CICP tags or gain map information that HDR depends on, so they throw it away. Without that metadata the image is treated as ordinary sRGB and isn't tone mapped correctly: highlights clip to pure white, or the whole picture looks flat and gray.
Q. Can I serve HDR images on a website?
Yes. Chrome and Edge (gain map JPEG from version 116, gain map AVIF from 129) and Safari 26 and later display HDR images. Firefox shows every HDR image as SDR, so always provide an SDR version or use a gain map format that falls back cleanly. The standard approach is to combine the CSS media query @media (dynamic-range: high) with the <picture> element, so visitors with HDR displays get a bright HDR image and everyone else gets a lighter SDR image.
Q. How do I batch convert HDR images on a Mac without losing quality?
You need an image app that correctly interprets transfer curves, peak luminance, CICP, and gain maps. With the Mac app Image Tool+, you can drag and drop iPhone HEIC photos or HEIF and RAW (DNG) files from your camera and batch convert them to AVIF, JPEG XL, or WebP while keeping HDR and wide color. Everything is processed on your Mac, so even unreleased photos are never uploaded anywhere.
9. Summary
As phone and computer displays improve, photography is moving quickly from SDR, which imitates paper, to HDR, which lets you see light itself.
But to make full use of the rich contrast and wide color of HDR photos, you need a workflow that handles CICP metadata and gain maps correctly. Convert them with a tool that only half understands HDR and blown highlights or dull colors will spoil an otherwise beautiful photo.
If you want to handle HDR photos on a Mac safely, simply, and reliably, give Image Tool+ a try. Drag and drop a folder, and your work comes out in next-generation formats with all of its light and color intact.
Mac App Store · One-time purchase · Fully local processing
Related guides
- How to share HDR photos on social media, and which platforms support them
- How to batch convert PNG, JPG, and HEIC to AVIF on a Mac
- How to batch convert JPG, PNG, and HEIC to JPEG XL (.jxl) on a Mac
- How to batch convert PNG and JPG to WebP on a Mac
- How to batch convert HEIC to JPG, PNG, or WebP on a Mac
- WebP vs AVIF: which should you use?
- Image Tool+ — a powerful batch image converter for Mac