How to Resize Photos on iPhone (3 Ways): Exact Pixels, in Batches
Published by @SoNiceInfo at 11/13/2026
You want to attach photos to an email, post them to a marketplace or a blog, or fit under an upload limit. An iPhone photo is several megabytes, so there are plenty of reasons to make it smaller. The Photos app, however, has no obvious place to set a size in pixels. This article covers three ways, with the real output of each: an app that shrinks many photos to an exact pixel size, the built-in Convert Image action in the Files app, and the Shortcuts app.
The three methods compared
| Method | How you set the size | Batches | Where it saves | Setup |
|---|---|---|---|---|
| Photo Batch (recommended) | Width and height in pixels | Yes | Photos | Get it on the App Store |
| Convert Image in Files | Four fixed sizes | Yes | Files | Save the photos to Files |
| Shortcuts app | Width in pixels | Yes | Photos | Build it yourself |
RecommendedMethod 1: Shrink photos to exact pixels in batches with an app (Photo Batch)
Photo Batch shrinks iPhone and iPad photos in batches and, if you want, converts them to JPEG, PNG, HEIC, WebP, or AVIF. You set the size first, then pick the photos, and it processes all of them.
Set the size
Under “Image processing” on the Home screen, turn on “Max width” or “Max height” and enter a value in pixels. With both on, photos are shrunk to fit inside both.
Pick the photos
Tap “Select photos to start”, choose “From Photos”, tap the photos you want, then tap Done. Processing starts by itself.
Tap “Save to Photos”
Tap the save button at the top right of the Queue, then “Save to Photos” in the share sheet. The images are saved to Photos with their original file names.
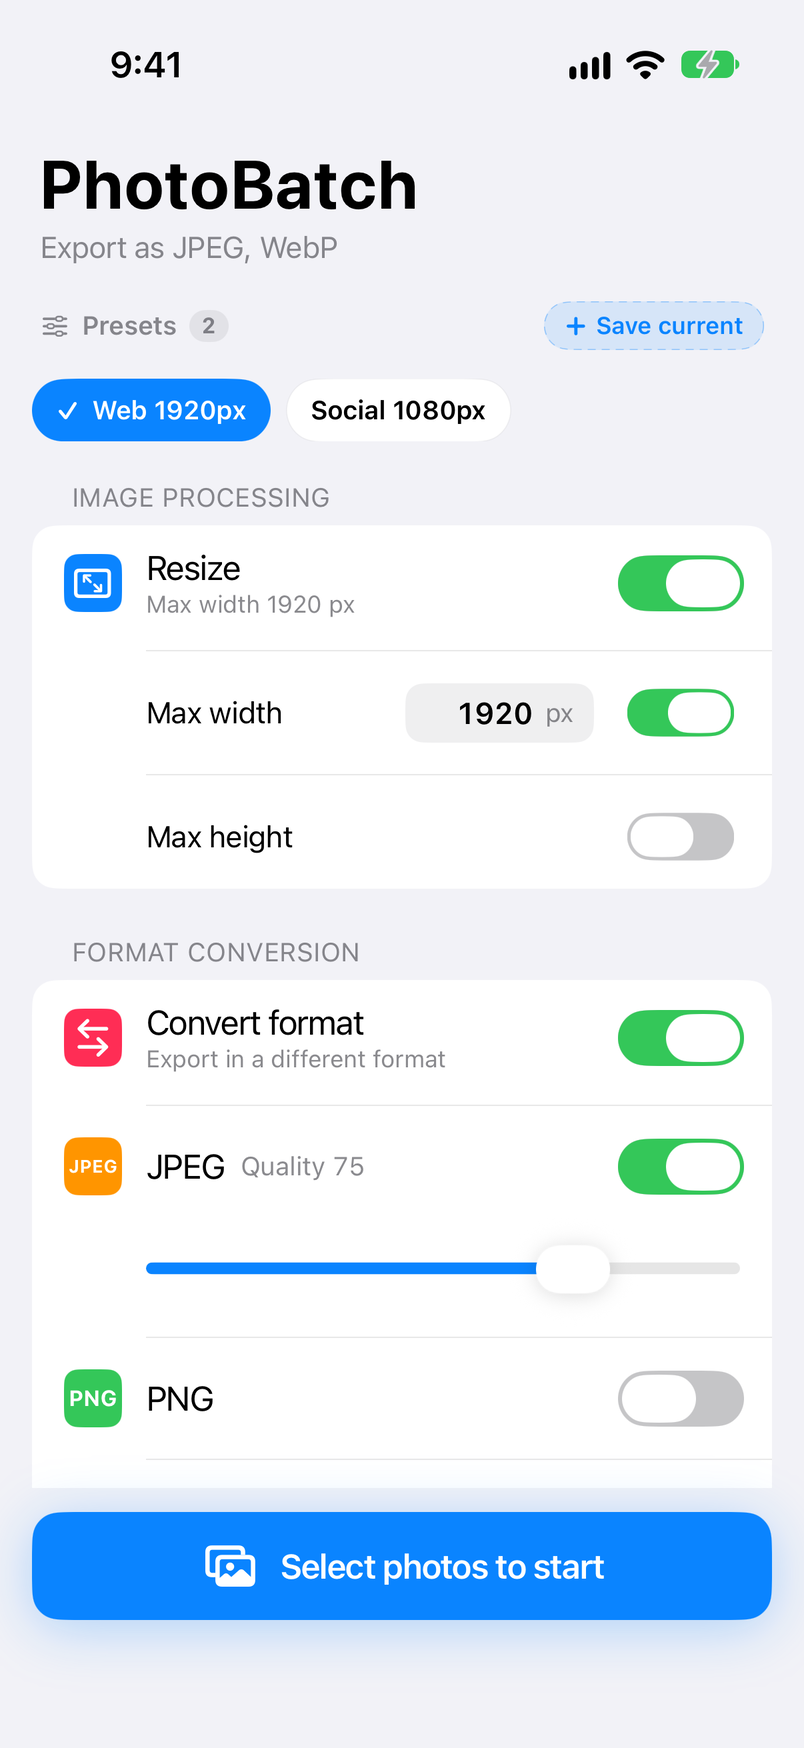
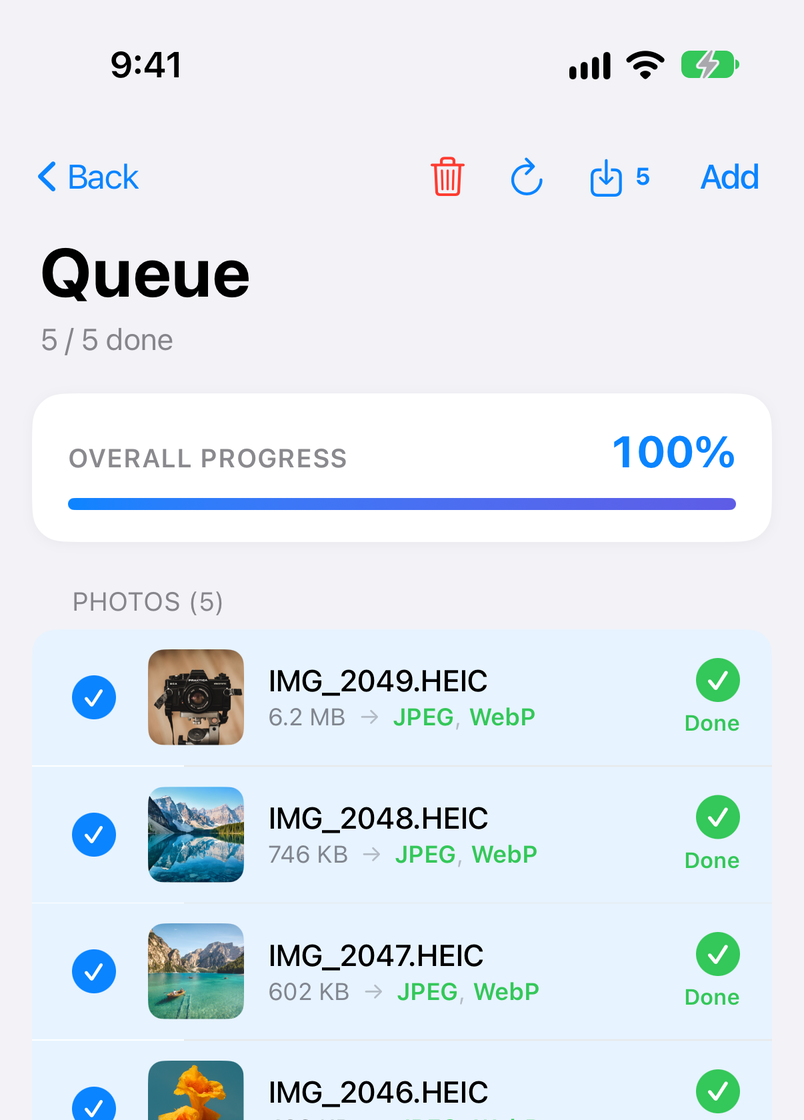
Here is what it does that the built-in tools don't.
- Sizes in pixels — match the rules of the place you're posting to, such as a 1920 px long edge or a 1200 px width. Photos smaller than the limit are exported as they are, not enlarged.
- One setting for portrait and landscape — with both a maximum width and a maximum height, every photo is shrunk to fit that box with its aspect ratio kept.
- Straight from Photos, and back under the same name — there is no need to move photos to Files first, and an image made from IMG_1234.HEIC is saved as IMG_1234.jpg.
- Format conversion and EXIF removal in the same pass — convert to JPEG or WebP while shrinking. With the settings as they are on first launch, EXIF including the location is removed.
- Compare the result — put a converted image side by side with the original and check the dimensions and file size.
Resizing, converting, removing EXIF, and saving are free. The free version shows ads and takes up to 10 photos at a time from Photos (no limit when you pick from Files). Pro, a one-time in-app purchase, removes the ads, raises the limit to 100 photos, and adds presets for saved settings, among other things. The Photo Batch user manual explains every screen.
iPhone and iPad · Free (with ads) · Processing stays on the device
No extra appMethod 2: Use Convert Image in the Files app
The Files app that comes with the iPhone has a Convert Image action that changes the format and the size of an image. It doesn't work directly on photos in the Photos app, so save the photos to Files first.
- In Photos, select the photos to shrink, tap the Share button, choose “Save to Files”, and pick a folder.
- Open that folder in Files and touch and hold an image.
- Choose Quick Actions > Convert Image from the menu.
- Pick the format: JPEG, PNG, or HEIF.
- Pick one of the four sizes. The conversion starts right away and a new file appears in the same folder as the original.
To convert several images at once, tap the button at the top right of the folder and choose Select, select the images, then choose Convert Image from the menu of the button at the bottom right.
What the four sizes come out as
The size is a step, not a number. Converting a 4032 × 2688 px photo (about 4.4 MB) to JPEG gave these results (checked on iOS 18.0; the three smaller sizes came out the same on iOS 27.0).
| Size you pick | Resulting image | File size |
|---|---|---|
| Small | 320 × 213 px | about 17 KB |
| Medium | 640 × 427 px | about 54 KB |
| Large | 1280 × 853 px | about 250 KB |
| Original | 4032 × 2688 px | about 4.6 MB |
In other words, the long edge becomes about 320, 640, or 1280 px. That is fine for email and messages, but it can't produce a number you choose, such as a 1920 px long edge or a 1200 px width, or anything larger than 1280 px short of the original. The new images are in Files, so to get them back into Photos you have to save them again from the Share button.
For people who like to build itMethod 3: Use the Shortcuts app
With the Shortcuts app that comes with the iPhone, you can build your own flow that picks photos, shrinks them, and saves them. Once it exists, running it gives you the same size every time.
- Create a new shortcut in the Shortcuts app. If iOS 27 opens a “Describe a shortcut” screen, tap Edit at the top right.
- Search the actions and add “Select Photos”, “Resize Image”, and “Save to Photos”, in that order (on iOS 18 the last action is called “Save to Photo Album”). The three connect by themselves.
- Tap the arrow next to “Select Photos” and turn on “Select Multiple”.
- In “Resize Image”, replace the width (640 at first) with the width you want in pixels. Leave the height on “Auto Height” to keep the aspect ratio.
- Run the shortcut and pick the photos; the smaller images are saved to Photos.
It takes a typed number and needs no extra app, but you have to build it first. A shortcut that sets only the width also gives portrait and landscape photos different long edges, and converting the format or removing EXIF takes more actions.
Which size to choose
How small to go depends on the use. If you go too small you'll have to redo it when you need a larger version, so when in doubt, stay on the large side.
- Email and messages — a long edge of around 1280 px. Plenty for a phone or computer screen, at a few hundred kilobytes per photo.
- Blogs and websites — a long edge of 1200 to 2000 px. It stays sharp at the full width of an article.
- Marketplaces and social media — a long edge of 1080 to 2048 px. Most services shrink uploads themselves, so there's no need to go very small.
- Forms with an upload limit — step down until the file fits. Exporting as JPEG at a lower quality helps too.
Which method fits you
- Many photos at a set size for a blog, a shop, or listings — Photo Batch. Sizes in pixels, and the location removed in the same pass.
- One or two photos to send by email — Convert Image in Files. No extra app.
- The same job every time, automated, with no app to install — the Shortcuts app.
- Batch conversion on a Mac — see How to Batch Convert HEIC to JPG, PNG, or WebP on a Mac.
FAQ
Q. Can I resize a photo on iPhone without installing an app?
Yes. In the Files app, touch and hold an image, then choose Quick Actions > Convert Image and pick a format and a size. The size is one of a few fixed steps, though: the long edge becomes about 320, 640, or 1280 px, or stays as it is. To set a number such as 1920 px, use an app or a shortcut.
Q. Does resizing delete the original photo?
Not with the methods in this article. Photo Batch leaves the original untouched and saves the smaller image to Photos as a separate image. Convert Image in Files also creates a new file with a different name next to the original.
Q. Can I resize many photos at once?
Yes. Photo Batch takes up to 10 photos at a time from Photos (100 with Pro), and has no limit when you pick images from Files. Convert Image in Files also works on several selected files in one go.
Q. Does resizing reduce the quality?
It reduces the number of pixels, so there is less detail when you zoom in. At the size people see on a phone screen, on social media, or in an email, a long edge of about 1280 to 2000 px looks sharp. If you only need a smaller file, don't go smaller than the use calls for. Keep the original so you can make another size later.
Q. Will portrait and landscape photos keep their aspect ratio?
Yes. Photo Batch works with a maximum width and a maximum height: it keeps the aspect ratio and only shrinks photos larger than the limit, never enlarging smaller ones. Convert Image in Files keeps the aspect ratio too.
Q. Can I remove the location (EXIF) at the same time?
With its settings as they are on first launch, Photo Batch removes EXIF (shooting data and location) from the images it exports, so photos for social media or marketplace listings are shrunk and cleaned in one step. To keep the camera model and the capture date, turn on “Preserve Exif”; you can then remove only the location.
Summary
To shrink iPhone photos to an exact pixel size, many at a time, Photo Batch is the quickest way. For one or two photos, Convert Image in the Files app is enough (three steps: a long edge of about 320, 640, or 1280 px). If you want the same job automated, build a flow in the Shortcuts app. Every method keeps your original photos.